Welcome back to our ongoing dialogue about Kubernetes. In the previous article, we successfully executed the Nginx installation and made our applications internet-accessible. However, you might’ve observed that the applications are operating under the HTTP protocol, which is not secure at present.
As of July 2018, with the release of Chrome 68, Google started marking all non-HTTPS websites as ‘Not secure’ in the Chrome browser. This means that if a website doesn’t use HTTPS, Chrome displays a warning to users in the address bar, indicating that the connection is not secure. The goal of this move was to push more webmasters to secure their websites with SSL/TLS certificates, providing a safer browsing experience for users.
Securing our applications through SSL encryption is crucial, particularly in production environments. For enhanced security, it’s recommended to procure and implement valid SSL certificates for all production applications.
However, for the development or testing environments, which may not require paid SSL certificates, you can make use of Cert-Manager. This tool utilizes Let’s Encrypt to generate SSL certificates free of cost, providing a secure and cost-effective solution for non-production environments.
Cert-Manager installation
-
Prerequisite - Kubernetes cluster with admin access is required. Make sure you have kubectl installed and configured to interact with your cluster.
-
Add the Jetstack Helm repository - Jetstack is the organization that maintains cert-manager, and they provide a Helm repository that we can use to install it:
helm repo add jetstack https://charts.jetstack.io
helm repo update- Install cert-manager CustomResourceDefinitions (CRDs) - These are the resources that cert-manager uses to store its configuration. Run the following command to install the CRDs:
Please make certain that you are utilizing the most up-to-date version. You can achieve this by substituting v1.13.0 with the newest release from the cert-manager official GitHub repository.
Visit the following link to obtain the latest version: Cert-Manager Releases.
kubectl apply -f https://github.com/cert-manager/cert-manager/releases/download/v1.13.0/cert-manager.crds.yaml- Create cert-manager Namespace - It’s a good practice to install cert-manager in its own namespace. Use this command:
kubectl create namespace cert-manager- Create
value.yamlfile with the content below
ingressShim:
  defaultIssuerName: "letsencrypt-prod"
defaultIssuerKind: "ClusterIssuer"- Install cert-manager Helm chart - This will install cert-manager along with its components:
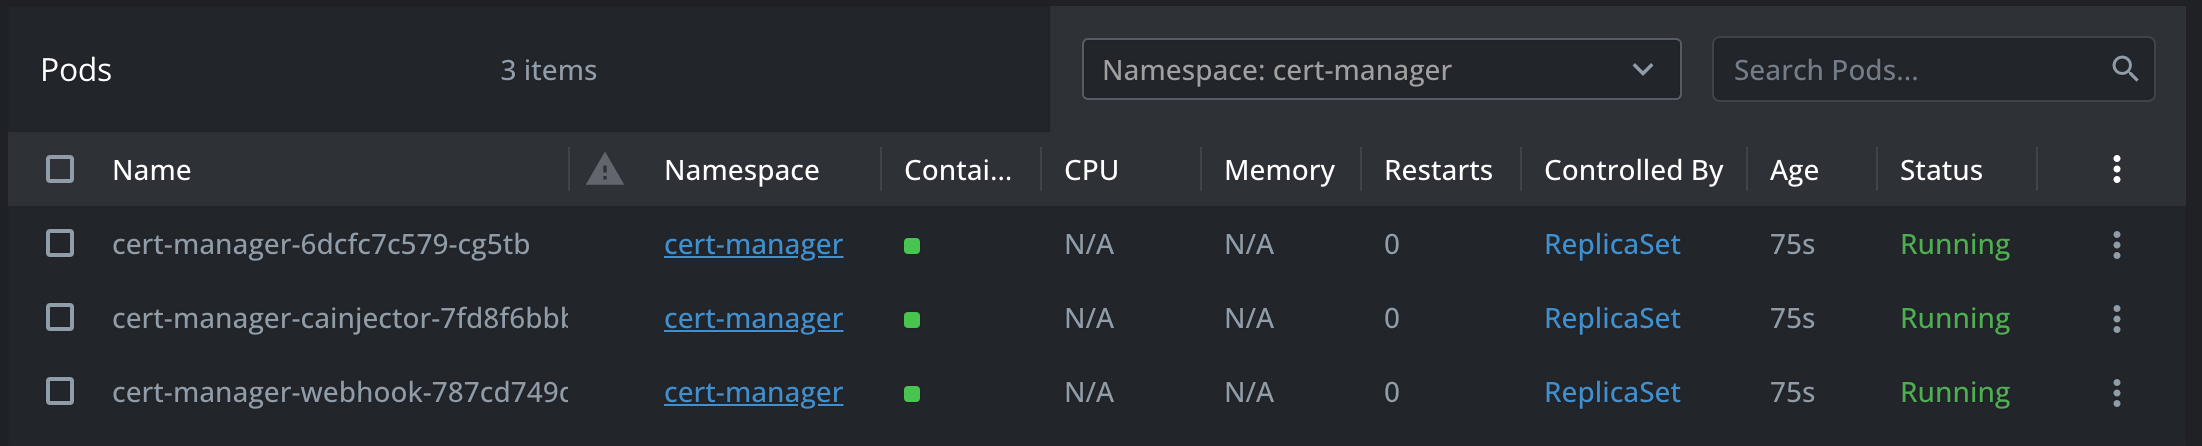
helm install cert-manager jetstack/cert-manager --values values.yaml -n cert-manager- Verify the Installation - Check if the cert-manager pods are running:
- Cluster Issuer configuration
# File name is `cluster-issuer.yaml`
apiVersion: cert-manager.io/v1
kind: ClusterIssuer
metadata:
  # The name should be the same with `defaultIssuerName` above
  name: letsencrypt-prod
  namespace: cert-manager
spec:
  acme:
    server: https://acme-v02.api.letsencrypt.org/directory
    # Replace with your domain email.
    email: [email protected]
    privateKeySecretRef:
      name: letsencrypt-prod
    solvers:
      - http01:
          ingress:
            # The ingress class name of nginx.
            class: nginx
Apply it on the cluster:
kubectl apply -f cluster-issuer.yamlUpdate echo-app ingress.
Leverage the existing echo-app to enhance your project. We’ll revise the ingress configuration to enable HTTPS for secure communication in our application.
Additionally, we’ll integrate with cert-manager for automated SSL certificate generation.
apiVersion: networking.k8s.io/v1
kind: Ingress
metadata:
name: echo-ingress
namespace: default
annotations:
# 1. enable cert-manager for this ingress
kubernetes.io/tls-acme: "true"
spec:
ingressClassName: nginx
# 3. Config the tls secret name. Replace the domain and secretName below with your config accordingly.
tls:
- hosts:
- echo.drunkcoding.net
secretName: tls-drunkcoding-net
rules:
- host: echo.drunkcoding.net
http:
paths:
- pathType: Prefix
path: "/"
backend:
service:
name: echo-service
port:
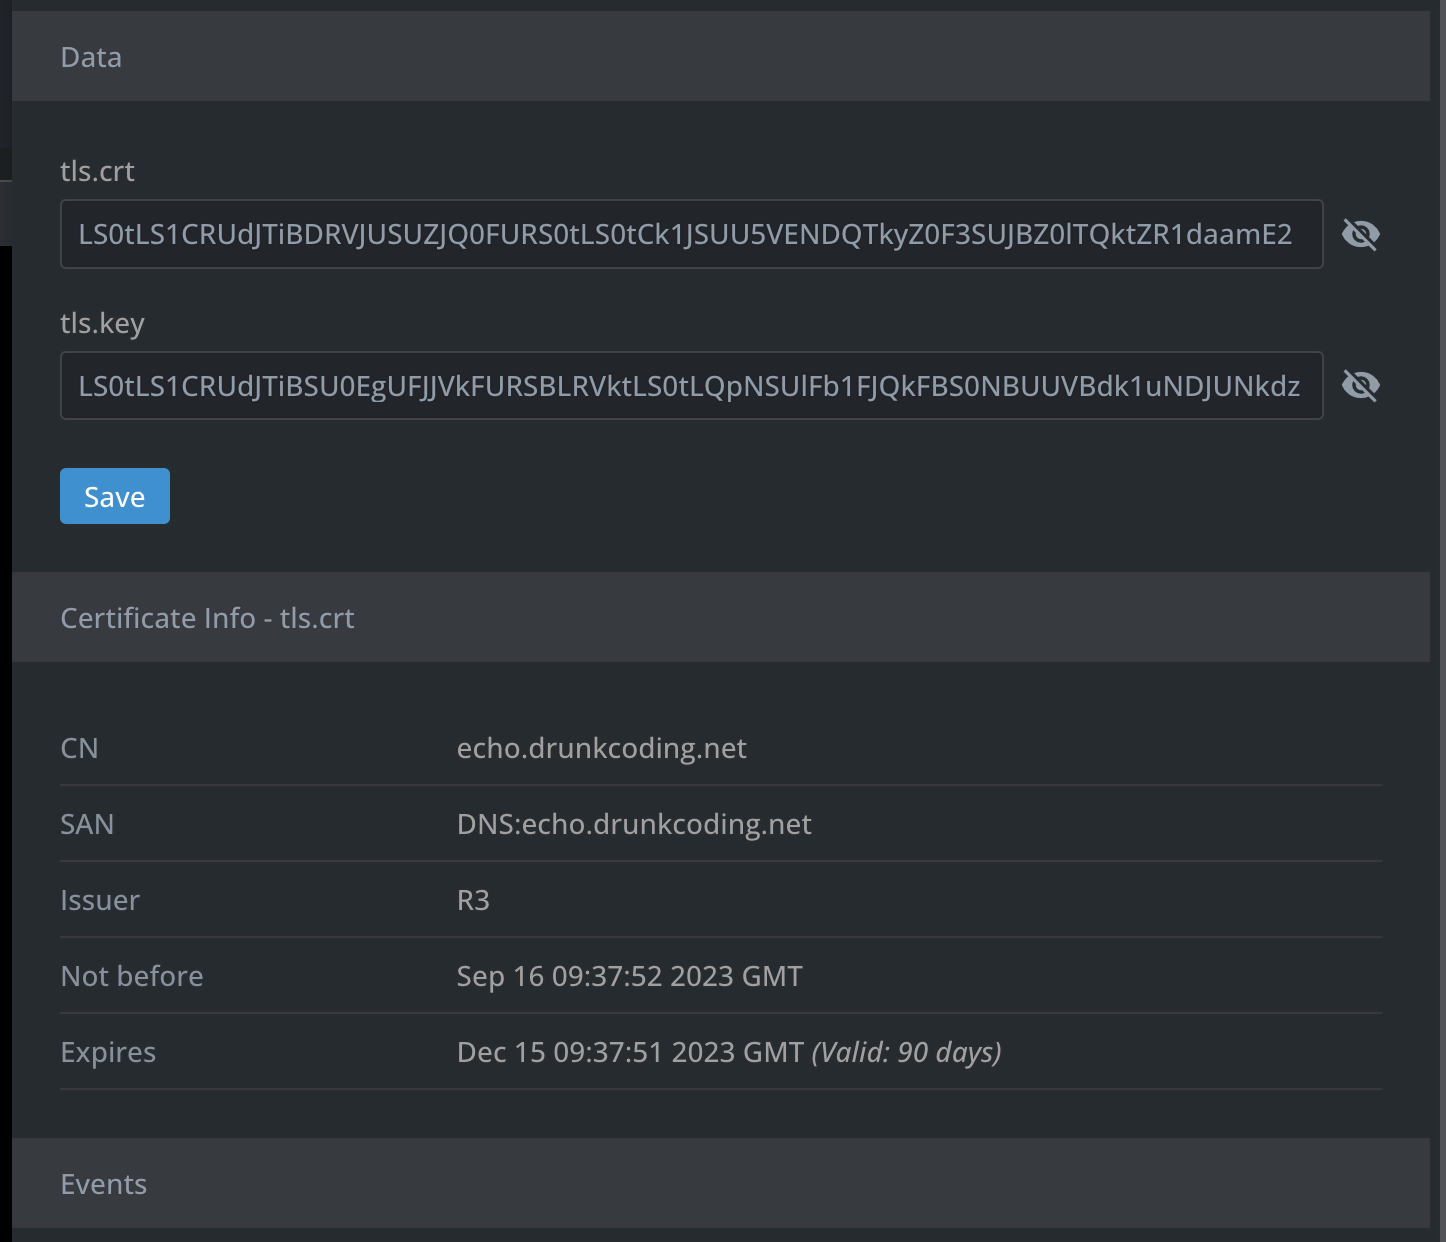
number: 80The certificate generated from
Let's Encrypthas validity of 90 days. However, thecert-managerwill automatically renew the certificate as it nears its expiration date.
Verify application
Once the configuration is properly set up and the certificate has been successfully issued, you should be able to locate a certificate named tls-drunkcoding-net housed under the default namespace secrets.
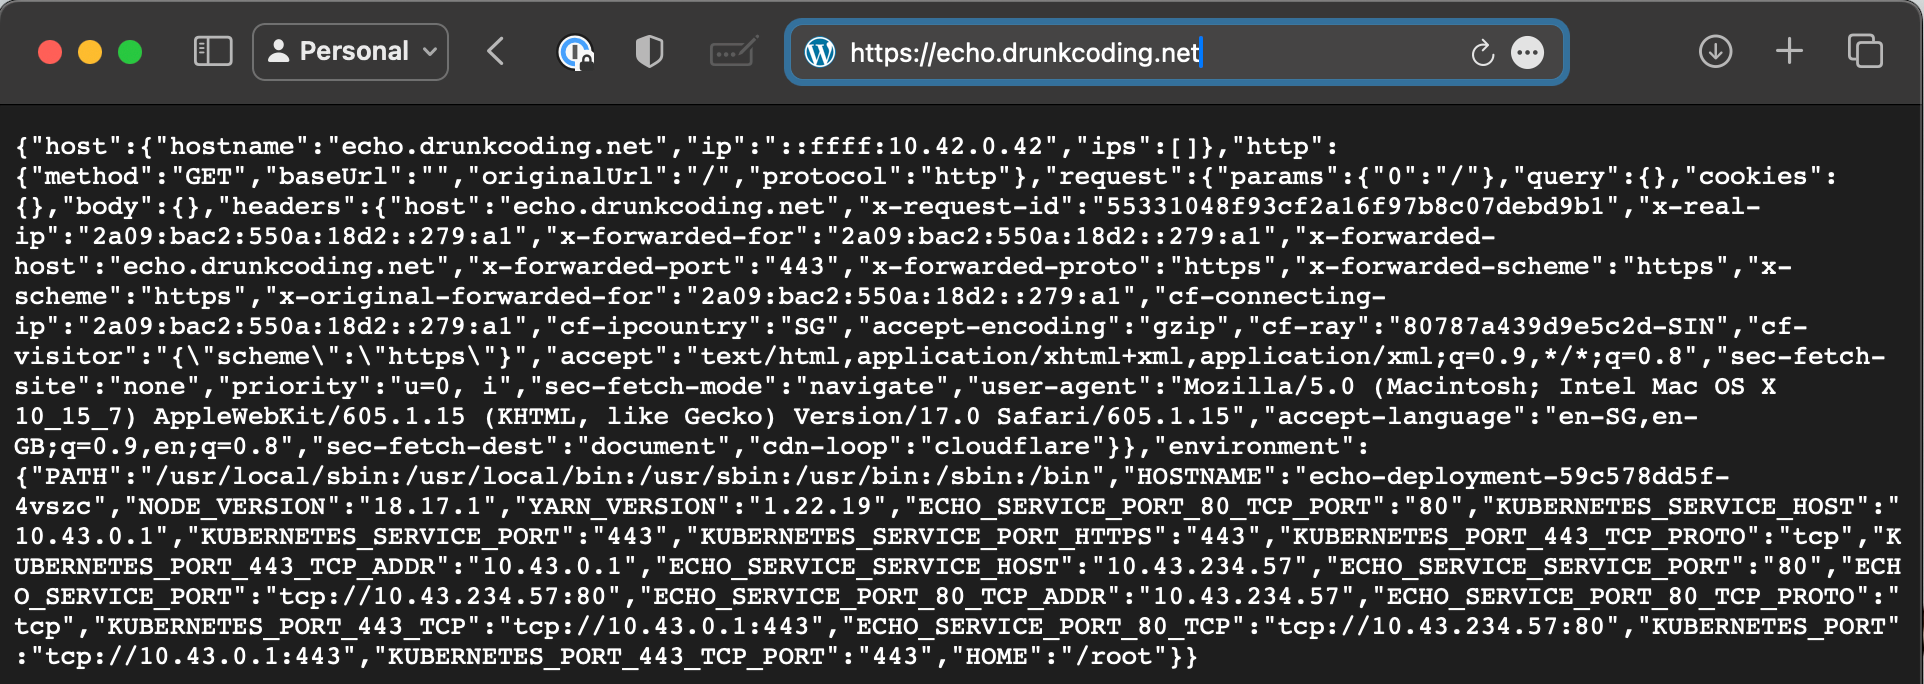
The application is also fully functional with SSL for secure communication.
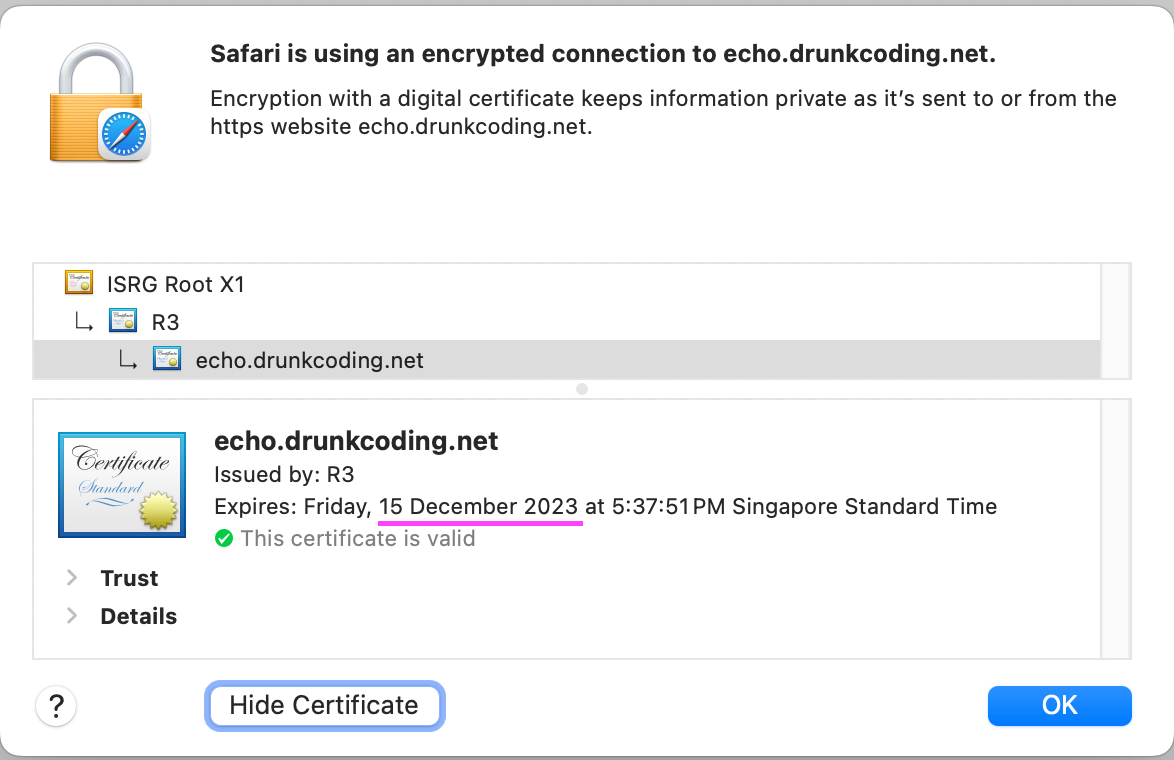
Below is the detailed certificate information as seen from the browser.
Thank you for your time! If you have any further questions, feel free to ask. 🌟✨🎁
Steven GitHub