In this guide, share some useful tips to help you seamlessly install K3s on a Raspberry Pi 4 cluster. Let’s dive in and start the installation process.
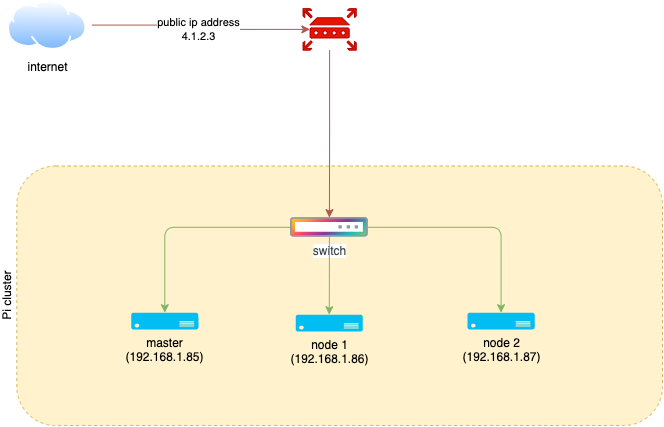
Raspberry Pi4 CLuster Illustration.
Before beginning the installation process, let’s take a moment to review the cluster setup and the corresponding IP addresses assigned to each node in our Raspberry Pi 4 cluster.

In our configuration, we have three Raspberry Pi 4 units connected to a switch. This switch, in turn, is connected to the router supplied by my internet service provider. Additionally, I have been provided with a static public IP address for internet access.
The table below outlines the specific IP configuration for each of the nodes in our Raspberry Pi cluster:

I will pick the Pi running at 192.168.1.85 as my master mode and start the installation as below instructions.
K3s Installation
Pi Os installation
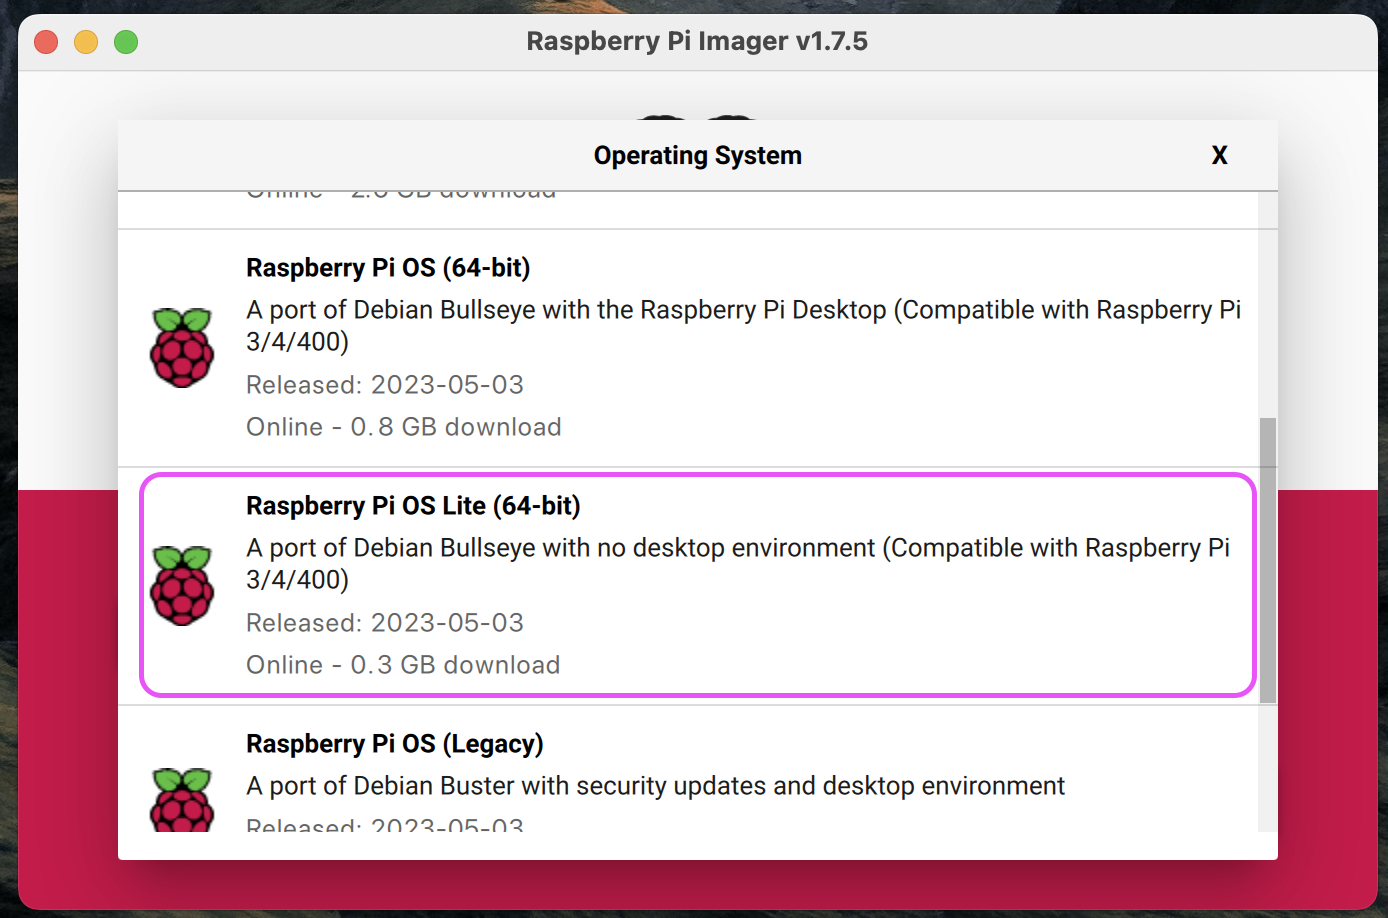
Given our project’s need for a k3s cluster, I selected the Raspberry Pi OS Lite 64Bit which can be downloaded from the Raspberry PI Imager. This particular OS variant doesn’t include a desktop environment. Thus, SSH will be our primary method for node installation.

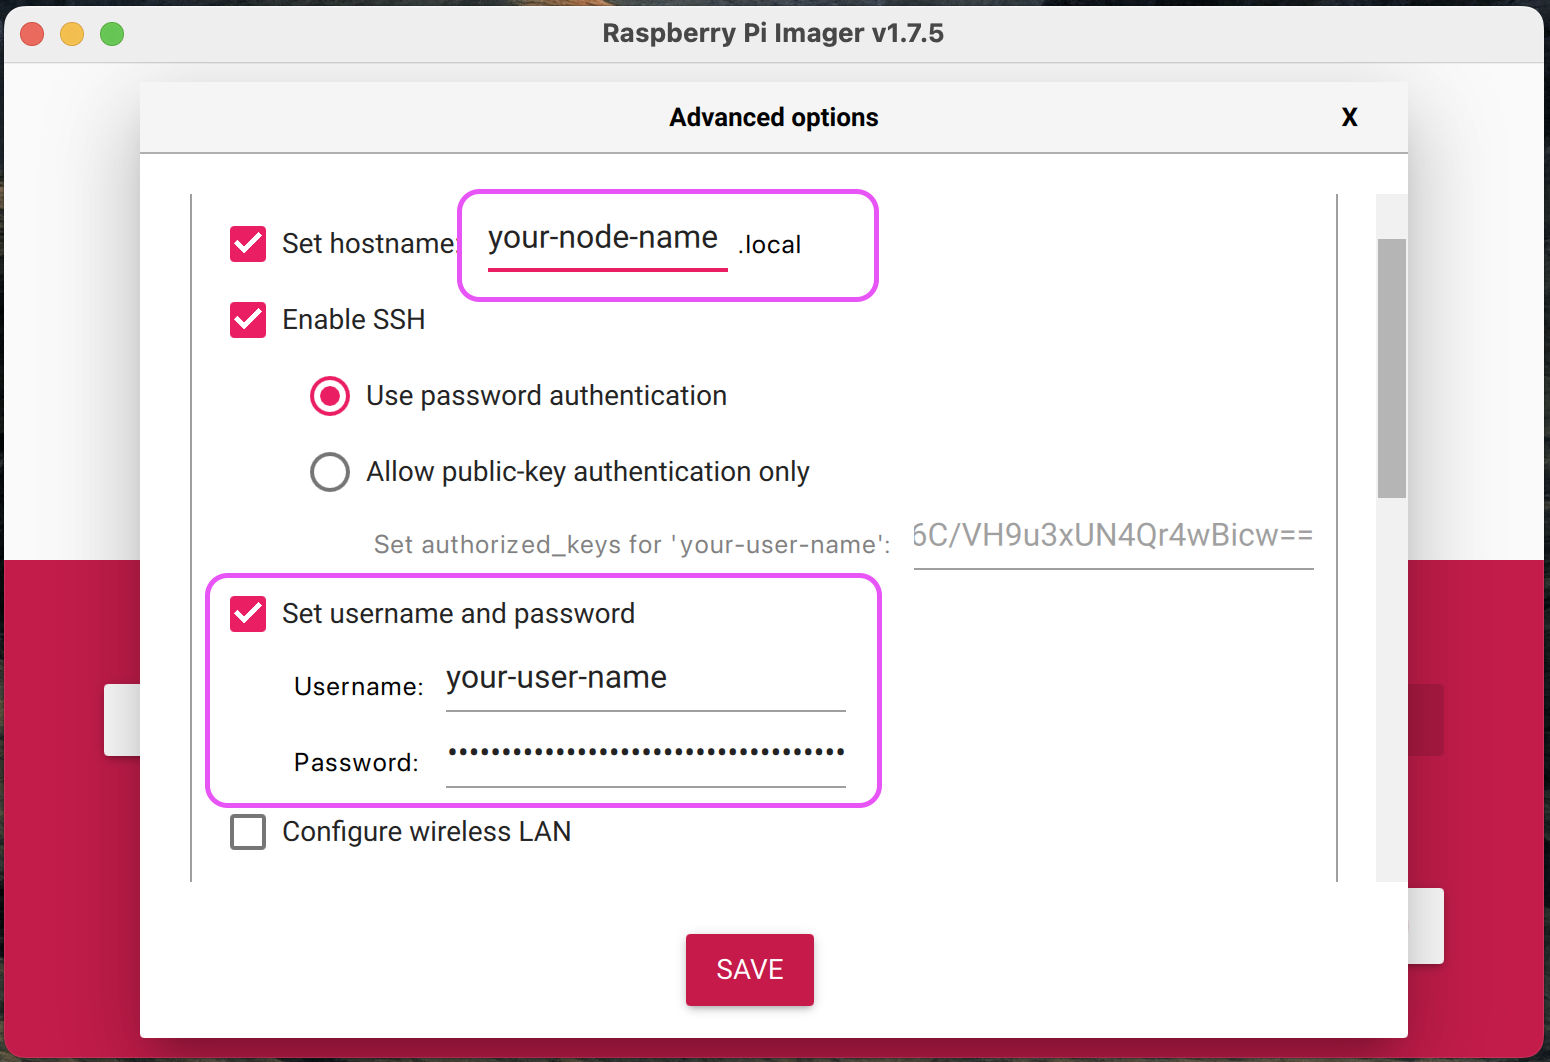
Before you flash the OS onto the SD Card, it’s crucial to configure the node name and login details for each node.

Once the OS preparation for each node is complete, I set up the following cluster:
- pi-master: 192.168.1.85 (Running Pi OS Lite 64Bit)
- pi-node-1: 192.168.1.86 (Running Pi OS Lite 64Bit)
- pi-node-2: 192.168.1.87 (Running Pi OS Lite 64Bit)
I use Termius as my tool of choice for establishing a connection to the cluster for installation purposes. You can download it for free from here.
I. Config static IP for Pi
By default, Pi OS will use DHCP to receive random Ip from the router, so to ensure the stable connectivity between the node We will config the status IP for each node by using the following steps.
# 1. Open the file dhcpcd.conf
sudo nano /etc/dhcpcd.conf

# 2. update the below parameters according to your router ip-address.
interface eth0
static ip_address=192.168.1.85/24
static routers=192.168.1.254

# 3. select control + X and save the changes.
II. Disable swap
When installing Kubernetes on Linux, it’s recommended to disable swap because of how Kubernetes manages resources.
-
Memory Management: Kubernetes efficiently manages and allocates resources, including memory. Allowing an operating system to swap can interrupt Kubernetes’ memory management process.
-
Performance Issues: Swapping can lead to performance degradation. When Kubernetes needs to access something that has been swapped to disk, it must wait for it to be loaded back into memory, causing delays.
-
Predictability: Disabling swap helps ensure predictable performance, as it removes the chance of the system swapping out Kubernetes’ processes.
-
Kubernetes Design: Kubernetes is designed to work with no swapping activity. It assumes that applications are memory-resident, which means it expects them to stay in memory all the time.
To disable swap on Linux, you can use the following command:
# 1. Turn off swap temporary.
sudo swapoff -a

# 2. To turn of swap permanently we need to update the `CONF_SWAPSIZE` in `dphys-swapfile` file to `0`
sudo nano /etc/dphys-swapfile

# 3. set
  CONF_SWAPSIZE=0

# 4. select control + X and save the changes.
III. Cgroup configuration
If a FATA[0000] failed to find memory cgroup (v2) error surfaces during the installation of k3s, it is likely because the Pi OS lacks the required cgroup configuration. Below are the steps needed to resolve this issue:
# 1. Open the cmdline.txt file
sudo nano /boot/cmdline.txt

#2. Add below into THE END of the current line
cgroup_enable=cpuset cgroup_memory=1 cgroup_enable=memory

# 3. Save the file and reboot
sudo reboot
IV. Master node installation
Execute the following command to install the K3s master node. Make sure to replace the IP address according to your cluster configuration:
curl -sfL https://get.k3s.io | INSTALL_K3S_EXEC="server --disable=traefik --flannel-backend=host-gw --tls-san=192.168.1.85 --bind-address=192.168.1.85 --advertise-address=192.168.1.85 --node-ip=192.168.1.85 --cluster-init" sh -s -K3s parameters examination:
- server: This is telling k3s to run in server mode (as opposed to agent mode). In server mode, k3s will start up and manage Kubernetes master components.
- —disable=traefik: This is instructing k3s to disable the Traefik ingress controller. By default, k3s includes and enables Traefik; this flag will prevent that from happening.
- —flannel-backend=host-gw: This flag is setting the backend for Flannel (k3s’s default network provider) to use. The host-gw option provides high-performance networking by creating a route for each node in the cluster.
- —tls-san=192.168.1.85: The —tls-san flag allows you to specify additional IP or DNS names that should be included in the TLS certificate that is automatically generated for the Kubernetes API server. You can repeat this flag to add more than one SAN. The value 192.168.1.85 is an additional Subjective Alternative Name (SAN) for the Kubernetes API server’s certificate.
- —bind-address=192.168.1.85: This is the IP address that the k3s API server will listen to.
- —advertise-address=192.168.1.85: This is the IP address that the k3s API server will advertise to other nodes in the cluster. They will use this IP to connect to the API server.
- —node-ip=192.168.1.85: This defines the IP that should be used for Kubernetes services on the node.
- —cluster-init: This flag instructs k3s to initialize a new Kubernetes cluster. If this flag is not provided, k3s will join an existing cluster if one is available.
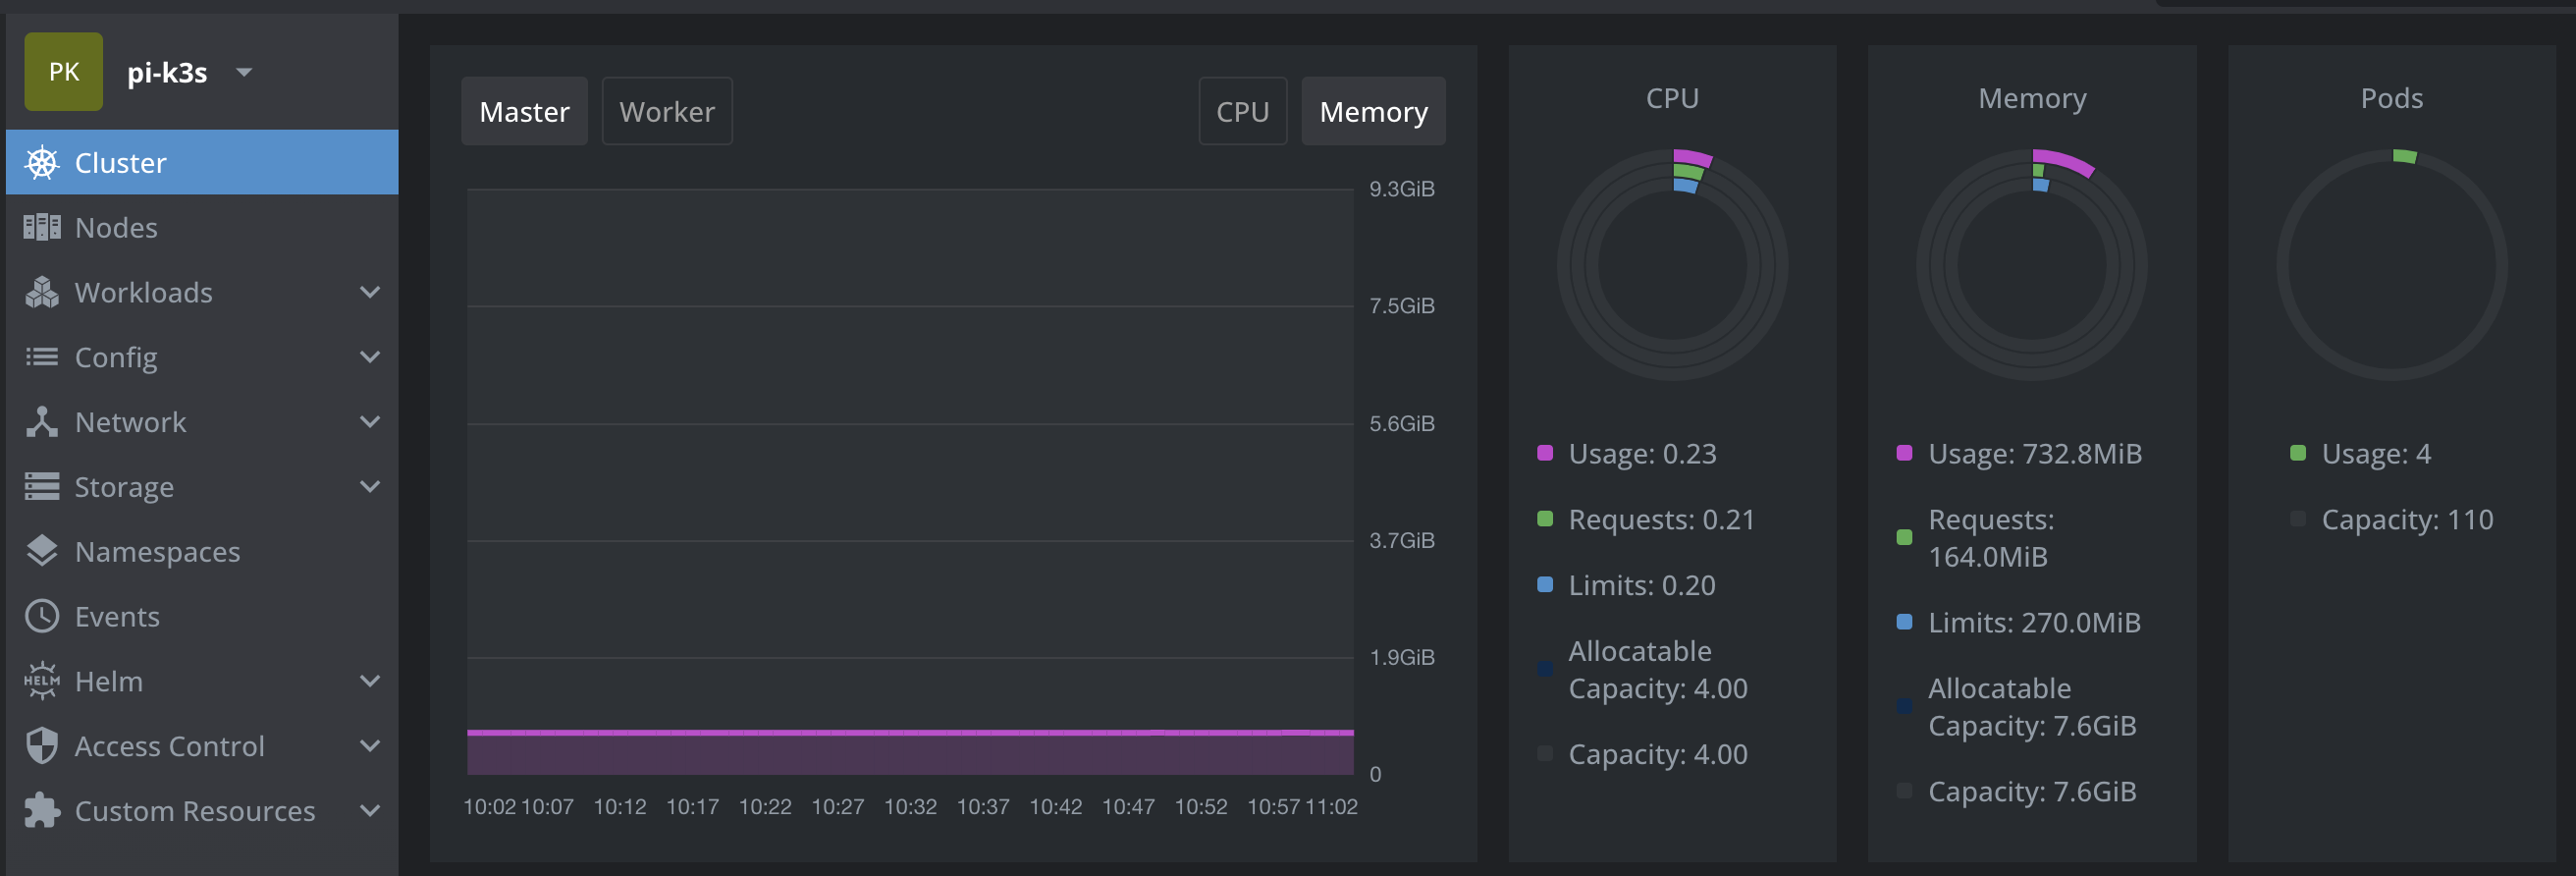
Once installed, the k3s configuration should be located in /etc/rancher/k3s/k3s.yaml. Using this configuration with K8s Lend allows access to the K3s cluster.
Here’s a snapshot of how it should look:

V. Worker nodes installation
To install the worker nodes, we first need to obtain the K3S_TOKEN from the master node. Execute the command shown below to retrieve it:
# get node-token from master node
sudo cat /var/lib/rancher/k3s/server/node-token

# The result is something likes this
  `THIS19937008cbde678aeaf200517f07c0ccd67dc80bdf4df6f746IS4780e15ebcd::server:40fc2cc2fnode81cdacc0b9bb1231token`
Upon retrieval of the node token, it is necessary to inject it into the script shown below. This script should be executed on all the Pi nodes specified previously. Please ensure to update the IP address associated with K3S_URL, as required.
# Execute this to install the nodes
curl -sfL https://get.k3s.io | K3S_URL=https://192.168.1.85:6443 \
  K3S_TOKEN="THIS19937008cbde678aeaf200517f07c0ccd67dc80bdf4df6f746IS4780e15ebcd::server:40fc2cc2fnode81cdacc0b9bb1231token" sh -
Congratulations, your K3s cluster is now ready to be utilized.

Thank You
Thank you for taking the time to read this guide! I hope it has been helpful, feel free to explore further, and happy coding! 🌟✨
Steven | GitHub